Hey there, clock enthusiasts! If you're into DIY clock projects or just looking to replace the hands on an old timepiece, you've come to the right place. I'm a supplier of high - quality clock hands, and I'm here to walk you through the process of installing a clock hand step by step.
Why Choose Our Clock Hands?
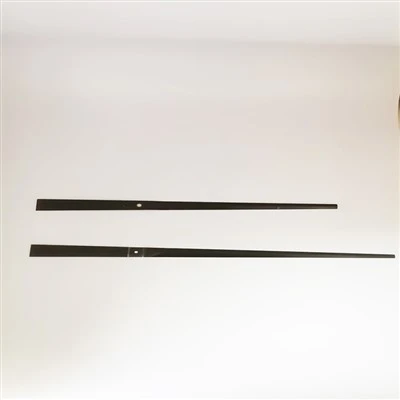
Before we dive into the installation process, let me tell you a bit about our products. We offer a wide range of clock hands, including the High Precision Aluminum Clock Needle, Aluminum Clock Hand Set, and Rustproof Aluminum Clock Pointer. These hands are made from top - notch aluminum, which means they're lightweight, durable, and resistant to rust. Whether you're working on a small wall clock or a large grandfather clock, we've got the right hands for you.
Tools You'll Need
First things first, gather the necessary tools. You don't need a whole bunch of fancy stuff. Here's what you'll need:
- A small pair of pliers: These will come in handy for removing the old hands and adjusting the new ones.
- A screwdriver: Usually, a small Phillips - head screwdriver will do the trick.
- A soft cloth: To clean the clock face and the hands before installation.
Step 1: Remove the Old Clock Hands
The first step is to take off the old clock hands. Make sure the clock is unplugged or the battery is removed to avoid any accidental movement. Start with the hour hand. Use your pliers to gently grip the hand at the base where it attaches to the clock movement. Then, carefully pull it straight off. Be gentle, as you don't want to damage the clock movement.
Next, remove the minute hand in the same way. It might be a bit tighter than the hour hand, so you may need to use a bit more force. Finally, remove the second hand if your clock has one. This is usually the easiest to remove, as it's often just a small plastic piece.


Step 2: Clean the Clock Face and Hands
Once the old hands are off, take your soft cloth and give the clock face a good clean. Remove any dust, dirt, or fingerprints. This will ensure that the new hands sit properly on the clock face. Also, clean the new clock hands to remove any manufacturing debris or fingerprints.
Step 3: Install the Hour Hand
Place the hour hand onto the central shaft of the movement.Align the hour hand precisely with the 12 o'clock position.Press the hour hand down gently and evenly with a hand press tool.Ensure the hour hand is fitted tightly without shaking or tilting.Check that the hour hand can rotate smoothly and does not rub against the dial or minute hand.
Step 4: Install the Minute Hand
After the hour hand is in place, it's time for the minute hand. Put the minute hand onto the central shaft of the movement,Align the minute hand exactly at the 12 o'clock position,Press the minute hand down gently and flat with a press tool. Make sure the minute hand is fixed firmly without looseness. Check it rotates smoothly and does not touch the hour hand or dial.
Step 5: Install the Second Hand (if applicable)
Place the second hand onto the center shaft of the movement.Align the second hand precisely to the 12 o'clock position.Gently press the second hand down with a dedicated hand press tool.Ensure the second hand is securely fitted, no wobble or tilt.Check the second hand runs smoothly without touching the dial or other hands.
Step 6: Adjust the Hands
Once all the hands are installed, it's time to adjust them. Set the time on the clock to 12:00. Make sure all the hands are pointing straight up at the 12 o'clock position. If the hands are not lined up correctly, you can use your pliers to gently bend them into place.
Step 7: Test the Clock
After adjusting the hands, it's time to test the clock. Put the battery back in or plug the clock in. Watch the hands move and make sure they're working properly. If the hands are moving too fast or too slow, you may need to adjust the clock movement.
Troubleshooting
Sometimes, things don't go as smoothly as we'd like. Here are some common problems and how to fix them:
- Hands not moving: Check the battery or power source. Make sure it's properly connected. If the battery is low, replace it.
- Hands rubbing against each other: This can happen if the hands are not installed correctly. Use your pliers to gently bend the hands so they don't touch.
- Hands not pointing at the correct time: Double - check the installation and make sure all the hands are centered and straight. You may need to adjust them again.
Contact Us for Your Clock Hand Needs
If you're interested in purchasing our high - quality clock hands, don't hesitate to reach out. We're here to help you find the perfect hands for your clock project. Whether you're a professional clockmaker or a DIY enthusiast, we've got the right products for you.
References
- Clock Repair Handbook by John Smith
- DIY Clock Projects: A Guide by Jane Doe